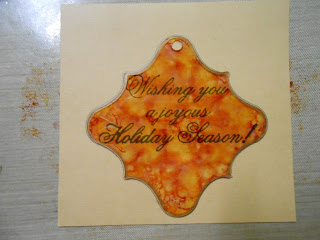
Friday, November 30, 2012

Glittered Christmas Light Bracelet

Today I have a fun and relatively easy Christmas project combining polymer clay are Art Glitter.
These glittered Christmas lights could be used in decorations or as embellishments for mixed media projects or in this case for jewelry.
For this project I used:
Pardo Jewerly Clay in Ruby, Peridot and Gold
Art Glitter - Ultrafine Opaque - #1 - True Red, Ultrafine Transparent Neon - #241 - Fresh Lime, and Ultrafine Opaque - #65 - Old Gold
Antique brass spacer beads from Metal Gallery
Antique brass eye rings
Antique brass chain and toggle clasp
Art Glitter - Designer Dries Clear Adhesive (DDCA)
Begin by cutting one ball of Pardo clay into fourths.

Roll each of the quartered sections into a ball and then pinch and taper the end to form a teardrop shape.

Trim eye pins to about 3/4" long so that when they are inserted through the spacer bead and into the clay, they will not come through the bottom of the clay.  Insert the eye pins to secure the spacer beads to the fat end of the teardrops.

Roll the clay in glitter corresponding to the color of the clay.

Repeat with the other two colors.  And bake according to clay instructions.  Be careful not to over bake!
After baking, pull the pins back out of the clay, dip the pins in DDCA and re-insert into the clay for a secure hold.  To keep the glitter from shedding, brush on a layer of gloss acrylic sealer and let dry.


To finish, add jump rings and attach the "lights" to brass chain.  Attach a toggle claps to each end of the bracelet chain.

TIP:  The transparent glitter is a little lighter in texture than the opaque glitters and when baking may "disappear" into the clay if you over bake.  If this happens, simply let the bulb cool and then brush on a light layer of DDCA and reapply the glitter.  (Do not re-bake)

Please visit the Art Glitter Blog for more glittering project ideas!

Happy Holidays!
KC

Sunday, November 25, 2012

Fall Crystal Necklace

Today I'm sharing a project that was inspired by the colors and textures of fall.  I love the fire and brilliance in Connie Crystal's colored crystal beads.  I mixed them with some metallic beads and copper and pewter colored seed beads and spacers.  The beaded section was then attached to vintage copper chain.  I like to mix beaded necklaces with chain for a few reasons - 1- I have long hair, and it makes no sense to do a full beaded necklace, when the back half will never be seen.  2-  I like the additional mix of textures from smooth, shiny beads, to vintage (or vintage-like) chain.  3- I find the chain to be more comfortable on my neck than beads. I also think the necklaces go together faster.  This necklace took me less than an hour - start to finish.


Detailed Instructions:
I began by gathering some of the Connie Crystal beads I had on hand in a fall color pallet.  Most of these colored beads are available in Connie Crystal Sun Catchers, but if you have a wholesale account, you can request specific beads or colors in bulk.

I selected and arranged the beads that I wanted to use for the necklace.


Then I raided my jewelry stash to come up with some metal beads, seed beads, spacers and chain.

I threaded a copper head pin through a small red crystal bead and the into the large copper focal bead and formed a loop at the top.  The small crystal bead at the bottom keeps the headpin from being swallowed by the large bead, as this bead has a larger hole.

I used Metallic Copper Soft Flex - about 18", a copper colored jump ring, and a copper crimp bead.  Thread the crimp bead onto the bead wire, run the wire through the jump ring and back through the crimp bead.  For the jump rings, I like to use split rings - the kind that are like a double loop - for a more secure hold.

After crimping securely, I trimmed the excess wire so that it could be concealed with the first bead.  For this, make sure that the first bead that you string on has a hole big enough for the end to tuck inside - a small seed bead won't work.

I continued beading the first half of the beaded section, alternating larger beads with seed beads and spacers.

I ran the wire through the loop at the top of the focal bead, and then reversed the bead pattern going up the second side.

After completing the bead pattern, I added a crimp bead, copper jump ring and brought the wire back through the crimp bead and first bead.  I crimped the crimp bead and trimmed the wire below the first bead. 

Then I attached copper chain to both of the jump rings.  This necklace was made long enough that I could get it over my head without a clasp, but since I may decide to sell it, I wanted to add a clasp.  To do this I simply found the center point on chain section and opened it up to add a lobster claw clasp on one side and a jump ring on the other.

Finished necklace against a light neutral background.

Finished necklace against a darker background.
As you can see, the mix of fall colors makes this a very versatile necklace.  Which color do you like it with?

Be sure to check out all the beautiful crystals and beads at Connie Crystal!!

And please visit the Connie Crystal Blog for more crystal projects, tips and tricks!

KC


Monday, November 19, 2012

Li'l Red School House - Message Board

This summer I was watching "Craft Wars" and fell in love with the little Red Schoolhouse that one of the contestants made as a playhouse. It inspired this Li'l Red Schoolhouse from the gingerbread house from Clear Scraps Gingerbread Banner.  My practical side likes functional art, so I decided to turn this into a message board as well.  Wouldn't this be a cute teacher's gift?!
The "blackboard" is a Clear Scraps Coaster that I painted on the back with black acrylic spray paint.  While that dried, I cut brick red card stock to glue to the back of the house with Zip Dry Adhesive.  The blackboard is trimmed and bordered by ribbons, and the bottom of the house and top of the chimney are trimmed in washi paper tape.  I used a silver metallic Sharpie to draw the bricks on the chimney.  I decided I wanted a little more texture, so the white roof was done with DecoArt Snow writer.


I used a white Wet Erase marker for the message.  This wipes off very easily with a slightly damp cloth or paper towel.  I have also added magnets on the back so this can hang as a message board on the frig or other surface.

Be sure to check out all the great acrylic products from Clear Scraps!

Happy Holidays!

KC


PS - The Gingerbread Banner also includes two Snowflakes.  Check out this post for an ornament idea made with the snowflakes!


Sunday, November 18, 2012

Faux Snow Snowflake Ornament

This is a quick and easy ornament project.  It is very kid friendly.  These would be great as teacher gifts, or write a personal message on the back and use them as gift tags.  These paper mache snowflakes are available at Hobby Lobby.

I started by painting the snowflake white with acrylic paint.  After that dried I sprayed the front side with Helmar V2 Vellum Adhesive.  While the adhesive was still wet, I placed the snowflake on a clean sheet of paper and sprinkled on the Faux Snow.

I shook off the excess snow and put it back in the jar.  Then I sprinkled the ornament with Art Glitter Ultra Fine Glitter - Pearlescent - #183 Blue Angel.  The glitter filled in any spaces on the adhesive that the snow had not filled.

Then I used purple and blue printed card stock to stamp "Let it Snow" and glued it to a purple backing.  I used Art Glitter Designer Dries Clear Adhesive (DDCA) to attach the card stock to the snowflake.  I finished with a swirl of rhinestones from Want2Scrap.  I used a little of the DDCA on the areas of the rhinestone swirl that extended over the "snowy" surface.

Thanks for stopping!


Friday, November 16, 2012

Art Glitter - Tombow - Fall Decor

Art Glitter is teaming up with Tombow to create some truly wonderful projects.  For my project I have made a mixed media Fall Decor piece.  The complete supply list and instructions can be found on the Art Glitter Blog today.

Please go check it out!  Along with the other Art Glitter/Tombow projects!

Thanks!
KC


Thursday, November 15, 2012

Clear Scraps & Quick Quotes Fall Wallhanging

Clear Scraps is teaming with Quick Quotes for a great blog hop this week.

Here's a preview of my project that you will find on the Clear Scraps Blog today.

Visit the blog and follow the hop for a chance to win FREE Clear Scraps!!!

Thanks for stopping!

KC


Thursday, November 8, 2012

Take the Plunge Necklace

photo courtesy of Bead Trends Magazine
I love a good "15 seconds of fame" and wanted to share one today.  I recently had the honor of having one of my necklaces featured in Bead Trends Magazine's November Issue. I saw a copy of this issue at Hobby Lobby last week and had to flip through to the page my necklace was on.  I had already seen the photos since the company sent me a copy of the magazine, but seeing it in a magazine that was still on the rack was a real trip!

"Take the Plunge" necklace was originally designed for a very good friend of mine to wear to her son's wedding.  It looked so beautiful on her that I re-created the design and submitted it for publication.

The necklace features two beautiful 20mm Raindrop Crystal Beads from Connie Crystal.  The crystals add a brilliant sparkle that would be perfect for the upcoming holidays!  The magazine has full instructions for creating this necklace, but please watch my posts on the Connie Crystal blog - I will be posting the instructions there in the near future!

Thanks for stopping!

Check out the Connie Crystal blog for lots of sparkling crystal projects!

If you just can't wait for the instructions, and want to purchase this necklace, it is available in my Etsy store.

Monday, November 5, 2012

I'll Bring the Wine - Burlap Wine Gift Bag

'Tis the Season.....From Thanksgiving until New Year's there will be lots of occasions for visiting friends, neighbors and family.  And, since we never like to show up empty handed, it can get really expensive just to attend these gatherings.  I try to save where I can, so today I'm putting together an inexpensive little wine bottle gift bag.
I started with a burlap bag that is just the right size for a bottle of wine.  I actually got this bag for free - it came with something packed in it.  Check some online sources for gift bags, and you can probably find some pretty cheep.  I saw some on Ebay that were about 14.00 per doz.  

I love the rustic charm of a burlap bag, but wanted to dress it up a bit.  I used a page from Clear Scraps Mini Deco Album to create a tag for my bag.  After removing the protective plastic, I daubed one side with alcohol inks in yellow, orange and purple.  I wanted a nice blend of fall colors.

Once I was happy with the tag, I repeated this on two leaves from Clear Scraps Clear Accent Embellishments.  Then I outlined the tag and leaves with a metallic copper Sharpie.  I also added some veins in the leaves with the Sharpie.


For the tag I stamped a sentiment on a piece of card stock and then traced the tag around it.  I cut out the card stock and glued it to the back of the tag with Beacon Zip-Dry glue.  The sentiment shows through the alcohol inks, creating a pretty front for the tag, and I can add a personal, handwritten message to the back of the tag.

I used light copper wire to wire the tag and leaves to a bow and also to wire the bow onto the burlap bag.  To create a spiral texture in the wire, I wrapped it around a chopstick.

There!  Now I just need a bottle of wine, and I'll have a cute hostess gift.  One down.....20 to go...(gifts, not bottles of wine)

Thanks for checking the project out.  Please visit the Clear Scraps blog for more great acrylic projects!!

And please come back to visit again!  For the next 6 weeks its all projects to help get ready for the holidays!!

KC

Friday, November 2, 2012

Heart Ornament

Halloween is behind us....on to CHRISTMAS!!!  From now until December 25th, I will be filling my blog with lots and lots of Christmas projects - decorations, cards, tags and gifts!!  Please check back often for holiday inspiration!

I am starting with a Christmas Heart Ornament that was on the Art Glitter blog in July, but in case you missed it, here it is....

To make this ornament you will need:  1 paper mache heart ornament, Acrylic paint - pearl, brown distressed ink, 1" double faced tape, 1/4" double faced tape, lace ribbon/trim, Art Glitter - Ultrafine Transparent - #86 Angel Dust & Ultrafine Opaque - #139 Leather, Graphics 45 green holly ('Tis the Season) paper from the Christmas Emporium Collection, 3/4" red ribbon, 1/8" gold ribbon, Swirls Finesse - Brown from Want 2 Scrap, Art Glitter Designer Dries Clear Adhesive.
Paint the heart with pearl/metallic acrylic paint and antique with brown distressed ink.

Run two strips of 1" double faced (red line) tape from the top edge to the bottom edge.  Burnish with your finger to make sure the tape lies flat and secure to the curve of the heart.

Remove the red plastic from the tape and lay lace trim so that the outer edge of the trim runs along the outer edge of the tape.  The middle section will eventually be covered up so if the lace doesn't match up to the edge of the tape, don't worry about it.

Shake "Leather" Art Glitter onto the exposed tape.  Tap and brush off excess glitter.

Carefully remove the lace.

Cover the exposed tape surface with "Angel Dust" Art Glitter.  Tap and brush off the excess.

Cut a strip of the green holly paper about 1 1/4" wide.  Trim the edges with decorative trim scissors (paper shapers)  Lay the paper onto the heart and trim a "V" at the top and bottom to match the contour of the heart.  Set aside for a minute

Run a line of Designer Dries Clear Adhesive (DDCA) down the inside edge of the tape/glitter and place red ribbon so the the two pieces meet in the middle.  Don't worry about trimming the ends yet.

Run more DDCA down the center of the ribbon and adhere the strip of holly paper.  Once this is dry, trim the paper and ribbon along the top and bottom edge of the heart.  
Run a strip of 1/4" double face tape around the outer edge of the heart.  Place the end of the red ribbon at the top center, next to the hanging string, and work in an accordion fashion to create ribbon ripples around the heart.  Stop at the bottom tip and trim the ribbon.  Repeat on the other side.

Run another strip of 1/4" tape along the top of the ribbon ripples to "gather" ruffles.  Lay 1/8" gold ribbon down the center of this tape and cover the remaining exposed tape with "Angel Dust" Art Glitter.

Finish by adhering Want 2 Scrap rhinestone flourish to the face of the ornament.  Trim the flourish as desired to fit.

Stop by the Art Glitter Blog for more glittering fun!  

KC