Clear Scraps Acrylic Snowflake from the Gingerbread Banner set, Sizzix Embossing folder and Big Shot, Art Glitter Designer Dries Clear Adhesive (DDCA), Art Glitter Ultra Fine Opaque - #268 - Horizon, mix of coordinating papers, Sizzix Bigz Die - Tattered Flowers, Connie Crystal - Octagon Crystal AB, Want2Scrap Beautiful Bling Borders - Fancy Waves


Visit the Clear Scraps blog for more great acrylic projects!

Begin be tracing the snowflake onto your background paper and cut paper to fit. This paper is from Kaisercraft. Set the paper aside for a bit.

Place the snowflake in embossing folder and run through the embossing machine,
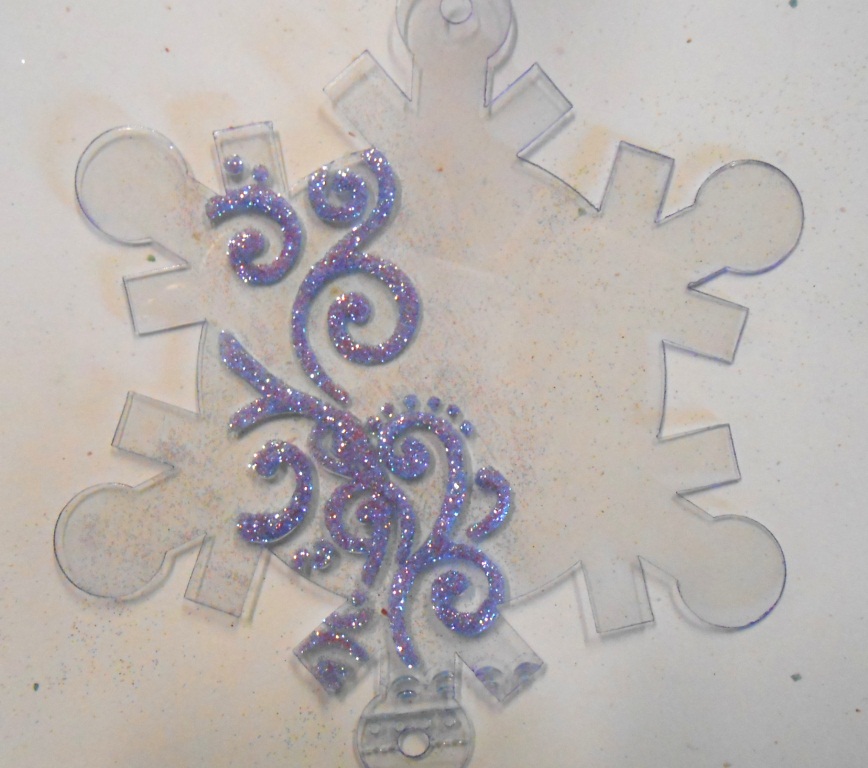
Remove the protective plastic from the backside of the acrylic, fill the recessed areas of the design with DDCA and cover with Art Glitter. Shake off the excess.

Once the adhesive has dried, turn the snowflake back over and use DDCA to glue the cut paper to the back of the acrylic. You only need a little glue - I put a drop at the end of each arm of the snowflake and a little bit behind the embossed area.

Run coordinating papers through the die cutter using the Tattered Flowers die cut.

Spritz the paper flowers with a little bit of water. Use a toothpick to round the ends of the petals. Let dry.

Assemble the flower by layering alternating papers and gluing each in place with DDCA.

Use DDCA to glue Connie Crystal octagon bead to the center of the flower,

Finish by gluing adding Want2Scrap bling to each of the tips of the snowflake. (don't forget to remove the protective plastic from the front of the acrylic, if you haven't already!) Glue the flower in place. Punch a hole in the paper at the top (there is already a hole in the acrylic) and add an eyelet. Tie silver ribbon in place for hanging.
Visit the Clear Scraps blog for more great acrylic projects!
Beautiful KC!! Love the ornament! And your techniques are awesome!
ReplyDelete