Thursday, June 7, 2012

Red Rubber Designs June Spotlight Stamp - Butterfly Scrapbook Page

It is the First Thursday of the month, so that means we have New Releases at Red Rubber Designs! June is about scrapbooking at RRD. All month, the design team will be posting scrapbook ideas like - layouts, mini albums, art journals, and embellishment ideas etc...all using the newly released June stamp sets.

We have a contest too - a Scavenger Hunt! How FUN! Each design team blog will have a different question about Red Rubber Designs and the answers can all be found in the Red Rubber Designs Store http://www.red-rubber-designs.com/

Once you find all 7 answers to the questions, email your answers to contest@RedRubberDesigns.comwith your name and email address. If you answered correctly, your name will be entered into a drawing for the June Spotlight Stamp Set - "Happily Grateful". One winner will be chosen at random. Good luck and Happy Hopping!

Contest ends Sunday, June 10th at Midnight (US-CT).

So here we go with my scrapbook layout.  For years I have proclaimed that I am NOT a scrapbooker (not that there's anything wrong with it)....it just wasn't one of my chosen crafts.  But when in Rome.....It is national scrapbook month and this week the team is all doing scrapbook layouts using the Spotlight Stamp - Happily Grateful.  

For this project I used:  Cardstock in Spring Green and Olive Green, Patterned paper from Reese Paper Stack, 2 pages and tags from the Pemberley Bay Matchbook Kit, Eyelets from the Mulberry Meadow set, Ribbon from Reece/Woodrowe & Angelee/Natalie sets, Palette Inks:  Jardin Moss, Sunflower, Beaux Arts Blue, Chartreuse, and embossing ink, Gold embossing powder and Stamps:  Happily Grateful, Background Soup and For Everything.

Of the 6 mini album kits, which one is the brightest color?

I began by creating a background on the lighter card stock - I swirled the Sunflower Ink pad to create a marbled background and then stamped the leaves from "Happily Grateful" stamp set in a random pattern of Sunflower and Chartreuse.  Then came my favorite part....adding a few butterflies and patterns from "For Everything" stamp - stamped with embossing ink, then covered in gold embossing powder and heat set.  

The flip out sections are pages from the Perberley Bay Matchbook Kit.  I hated to break up the kit, but I loved these colors and I really wanted to have pages within the page.  These are pre-scored for a fold line.  These were each attached to a piece of patterned paper with eyelets and then the ribbons were threaded thru and the section was attached to the base card stock with double face tape.


I added some tags inside the flip-out pages for titles or journaling.  To bring it all together, I stamped a few more butterflies and a few more leaves.

So there it is.....my FIRST EVER scrapbook page.

Be sure to visit the other Design Team Member's blogs to see more scrapbook layouts with this stamp set.
Red Rubber Designs  (There will be a post with contest details)
Sarah
Paula-Kay
Louise
KC (you are here)
Kate
Diana
Debra


And visit RedRubberDesigns.com to see more June release stamps - like this one:

Here I am


Saturday, June 2, 2012

Double Glittered Butterfly Card

Welcome to the Art Glitter/Dreamweaver Stencil Cross promotion month. We have paired up with this wonderful company to show you how our glitter can be used with these beautiful and detailed stencils. All of our designers will be using the Double Glitter Technique! Make sure and check out Dreamweaver Designers every Thursday!

You can find all their designers at http://dreamweaverstencils.blogspot.com/

Make sure and play along all month with this fun challenge. Make sure and LINK to the Dreamweaver site to be eligible for 1 of 4 prize packages featuring stencils and glitter! You may even get your creation featured on Art Glitter's Blog!

Hope everyone will play along with this fun challenge. If you don't know how to do the Double Glitter Technique please head over to http://www.youtube.com/watch?v=Foyo09lKpw4 to see Lynell Harlow demonstrate.

Also for the month of June Art Glitter is selling all 1 oz jars of glitter for $5.98 regular price $7.32! Hope even if you don't play along with the challenge you will take advantage of the great price of glitter in June! http://artglitter.com/

This was my second attempt at the Double Glitter Technique and I can tell you that I am totally addicted to these stencils!  I had learned a little from my first project - namely selecting colors for my design and background that had a great deal of contrast.

I used: Dreamweaver Stencil #591 Three Butterflies
Art Glitter Ultrafine Opaque Glitter: # 16 - Blackberry
Art Glitter Ultrafine Pearlescent #186 - Purple Polkadot
Art Glitter Ultrafine Transparent #104 - Spring Mint

I started by soaping the back of the stencil and sticking the stencil to the sticky paper. (soaped side down) Then I used my tape roller to attach the sticky paper to a piece of cardstock for stability. I wanted to do the butterflies in a different color than the flowers so I used painter's tape and scraps of paper to mask off the area that I did not want to glitter - leaving one of the butterflies showing.

I covered this exposed area with Blackberry Ultra Fine Opaque Glitter.
After tapping it gently into the stencil, I tapped off all the excess glitter to reveal my first firework burst. Piece of cake!

I repeated this process for each of the butterflies. Then I filled in the flowers with Purple Polkadot Ultrafine Pearlescent Glitter.  Then I carefully removed the stencil from the sticky paper and covered the exposed paper with Spring Mint Ultrafine Transparent glitter.

After shaking all of the excess glitter, this was my results:

I finished the card by attaching the glittered design to a piece of pink metallic card stock.  I wrapped a piece of dark purple card stock with a piece of light green ribbon, glued the glittered piece on top of that and then added a swirl of rhinestones from Want2Scrap and a bow.  This was then all attached to cream card stock for the card.

Be sure to check out the Art Glitter team and Dreamweaver team all month for more double-glitter goodness!!

Thursday, May 31, 2012

This girl ROCKS!

One week from today, Red Rubber Designs will roll out the new June stamp releases with a blog hop, scavenger hunt, and of course prizes!  But for now, I still have one more opportunity to share a project made with the May spotlight stamp - Hey Life.

Earlier this year, my niece and her husband adopted this adorable girl from Russia.  I have not had the pleasure of meeting her yet, but pictures of her with her new brothers just make me smile.  This was one of the first pictures I saw of her, after they brought her home, and I just love the way she is rockin this outfit!!  I have created a rock-n-roll picture frame to go with the picture.

I used the guitar from the Hey Life stamp set and a technique similar to the masterboard technique from last week's Tuesday Tutorials.  I stamped several guitars in Noir Palette Ink around the frame - turning them in different directions.  Then I did the same with the flower stamp from the Place in My Heart stamp set in Claret Palette Ink.  I created flower centers with glue and pink glitter and then added some more random glue dots with holographic silver glitter.

I used pink and black plaid paper from the Uptown Girl paper stack for the background behind the picture and a die-cut flower.  Added more silver glitter to the edges of the flower along with a little "Girlz Rock" resin center, and finished with another silver glitter flower for the corner.

I can't wait to see her and give her this picture for her very cool new room!

Friday, May 25, 2012

Warmest Wishes Card

Have you checked out the Tuesday Tutorials on Red Rubber Designs Blog?  RRD has a great design team with very diverse styles and strengths, and each week there is a technique, project or stamping "how to" featured on the blog.  These tutorials are also available for FREE download on the Red Rubber Design website.  This week's tutorial was "how to create a stamped masterboard".  Louise made it look so easy and fun, so I decided to try it.

I created my masterboard using the stamps from the "All Things in Nature" stamp set and Palette Inks in Charcoal, Beaux Arts Blue, Cognac & Jardin Moss.  Once the masterboard was done, I simply cut a piece to fit my card and added a few embellishments. I used papers from the Willoughby and Reece paper collections and ribbon from the Reece & Woodrowe collection.  I finished it off with some "rivets" made with a dimensional pearl pen.

Wednesday, May 23, 2012

Invitations and Decorations with a little BLING

I am a huge fan of the TV show Revenge.  (OK, I'm actually a little obsessed with it)  Since the season finale is upon us, (It will actually air the same day as this post), I decided to throw a little Season Finale viewing party for a few of my fellow Grayson Groupies.  I was inspired by Daniel and Emily's engagement party invites.

I started by creating the invitation on my computer and printing on plain white card stock.  I had pilfered the infinity symbol off the internet and wanted to highlight that.  I used Art Glitter Dries Clear Designer Adhesive and a fine tip and traced over the lines of the symbol and then sprinkled Art Glitter Ultrafine Opaque glitter in Country Red over the wet glue.  I did about 1/3 of the symbol at a time so that the glue was still wet when I added the glitter.  I used the same technique to form the infinity "g" in "Revenge".

For the crystal dangle, I used 2 Connie Crystal Raindrop Dangles (one for the invitation and one for the vase).  I threaded an eye pin through the hole in the crystal, bent the pin so that the eye extended above the top of the crystal and wrapped the long end back around the shaft below the eye of the pin.  Then I attached a large silver tone jump ring.


I tied a bow in a piece of red ribbon.  Then I laid the bow face down across a second piece of ribbon - ran the second piece of ribbon through the jump ring on the crystal and brought that up near the bow.  Then I tied the ribbon in a knot around the knot in the bow so that the crystal dangled below the bow.  Then I brought the ends of the second piece of ribbon around to the back of the invitation and attached the ribbon to itself with double stick tape.  I did not attach the ribbon to the invitation so that it can be slipped up or down or off to read the invitation.  I repeated this process to form a bow and dangle for a black glass vase (found at Hobby Lobby).

I had a lot of fun with this project and getting ready for the Revenge finale, but I really like the bling that the crystals add to the invitation and decorations.  I think they would be great for wedding invitations and decorations!

Monday, May 21, 2012

Distracted by Shiny Beach Glass

Beach Glass
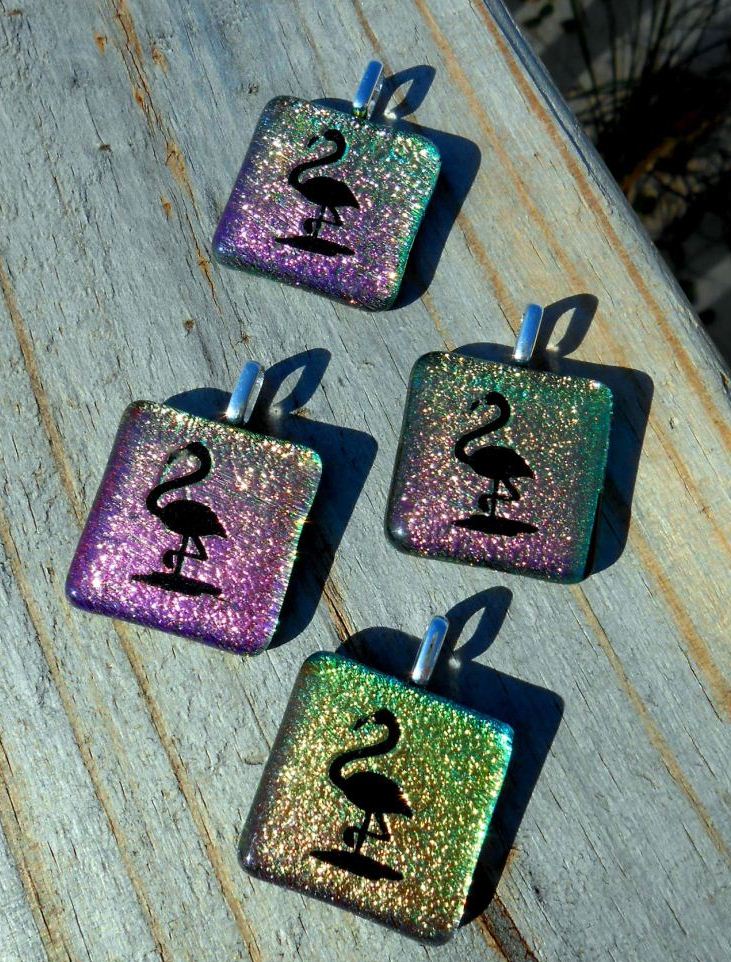
Today our short but wonderful beach vacation comes to an end and we begin the LONG drive home; so I just thought I'd share some shots of the glass pendants that I brought with me to try to promote in area shops.  Distracted by Something Shiny - Beach Glass.
Some are already available in my Etsy Shop.
Flamingos

Hibiscus

Hibiscus Chain

Dolphin
Seahorse


Saturday, May 19, 2012

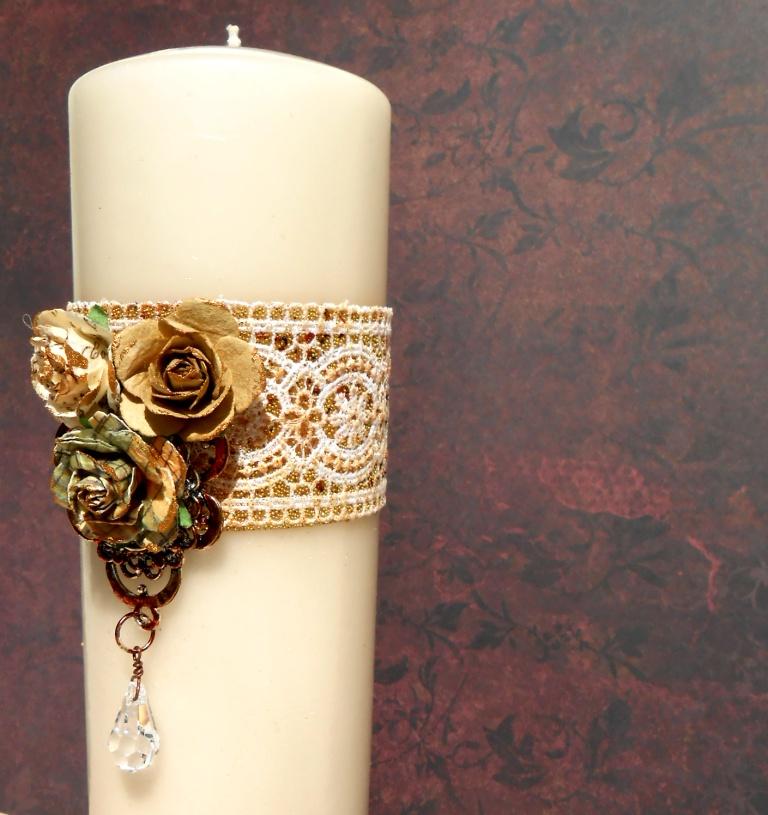
Dollar Store Candle to Shabby Chic

As a craft-a-holic, I tend to go through Dollar Stores and Thrift stores thinking "what can I make out of that?"  So this project is for all the other thrifty crafters out there that enjoy taking dollar store stuff and making them look like boutique items.

The Supplies:
-Tall pillar candle
-Wide lace that will go around the candle - this was left over from a spool of lace that I had from Hobby Lobby, but since you only need about 6" or 7", you can probably find this in your stash or possibly the remnant bin at your favorite craft or fabric store.
-Ranger Distressed Inks -Shattered Straw & Antique Linen
-Double sided tape - cut the same length and width as the ribbon
-Pastry Liners or Cupcake Liners
-Art Glitter Elements - #26 Redlands
-Art Glitter Small Beads - #80 Solar
-Art Glitter Ultra Fine Opaque Glitter - #65 Old Gold
-Soft Brush or Make-up Brush
-Ornate Cameo or Pendant Blank - this, again, was from my stash, but you can probably find something at a thrift store, yard sale, or check out the findings from Vintaj.  Just be sure it has an opening at the bottom to attach your crystal.
-Prima Flowers
-Connie Crystal Raindrop crystal
-Eye Pin
-Jump ring
-E6000 glue

1.  Start by measuring your lace around the candle and trim so that the ends will meet smoothly.  (at the back of the candle)  Lay the lace on paper or a protected surface and lightly dob the Distressed Inks on the lace to give it an aged look - Not too dark or there won't be enough contrast between the lace and the background that you'll be forming next.  (Optional step - my Pendant was antique silver and I wanted to "tarnish" it, so I dobbed the Distressed Inks on it as well)

2.  Measure and trim your double stick tape to the same size as your lace.  I used Red Line Tape that comes in a 8" x 11" sheet.  Remove the paper backing on the tape and carefully position the tape on the back side of the lace.  Leave the red protective plastic in place.

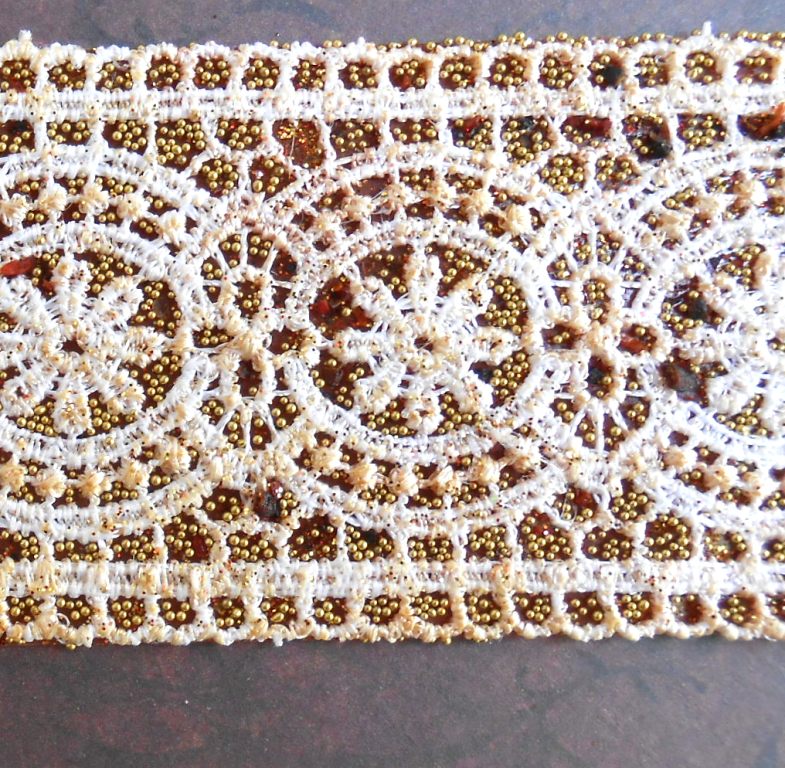
3.  We're going to do three layers of "inclusions" into the face of the tape. The first is the Art Glitter Elements.  Pour some out into a pastry liner or cupcake liner.  Beginning at one end of the lace, press the lace face down into the Elements.  Lift and repeat all the way down the length of the lace. Elements are very chunky and some of the chunks are too big for this project.  Brush the larger pieces off the lace with a brush or your finger.  You just want some of the smaller pieces to stick to add texture and deep color.  Pour the excess Elements back into the jar.

The second layer will be Art Glitter Small Glass Beads.  Pour some of the beads into a pastry liner and again press the lace, face down, into the beads, so that they fill in more of the areas where there is no lace.  Tap the lace over the pastry liner to remove excess beads.  Pour the leftover beads back into their jar.

The third layer is the Art Glitter Ultra Fine Opaque glitter.  For this layer, hold the lace, front side up, over a pastry liner or card stock, and pour the glitter over the lace.  The glitter will fill in the areas that the Elements and Beads did not cover.  Use a brush to press the glitter into any remaining exposed tape.  Tap the excess glitter back into the pastry liner.  Use a soft brush or make-up brush to brush off any excess glitter that may have temporarily stuck to the lace.

4.  Carefully remove the red tape liner from the back of the lace, making sure not to pull the tape away from the lace.  Find the center part of the lace that will be the front of the candle and line it up where you would like it on the candle.  Working from the center, out to the ends, gently smooth the lace/tape onto the candle.

5.  Bring the eye pin through the hole of the Crystal and bend so that the eye is about 1/8" above the top of the crystal.  Bring the straight end up and wrap it tightly around the shaft below the eye.  Trim off the excess.  Then us a jump ring to attach the crystal to the bottom of the pendant blank.

6.  Use E6000 to glue a Prima Flower to the center of the pendant.  Once that has set, use E6000 to glue the pendant in place on the lace and add more flowers at the top of the pendant.