You can find all their designers at http://dreamweaverstencils.blogspot.com/
Make sure and play along all month with this fun challenge. Make sure and LINK to the Dreamweaver site to be eligible for 1 of 4 prize packages featuring stencils and glitter! You may even get your creation featured on Art Glitter's Blog!
Hope everyone will play along with this fun challenge. If you don't know how to do the Double Glitter Technique please head over to http://www.youtube.com/watch?v=Foyo09lKpw4 to see Lynell Harlow demonstrate.
Also for the month of June Art Glitter is selling all 1 oz jars of glitter for $5.98 regular price $7.32! Hope even if you don't play along with the challenge you will take advantage of the great price of glitter in June! http://artglitter.com/
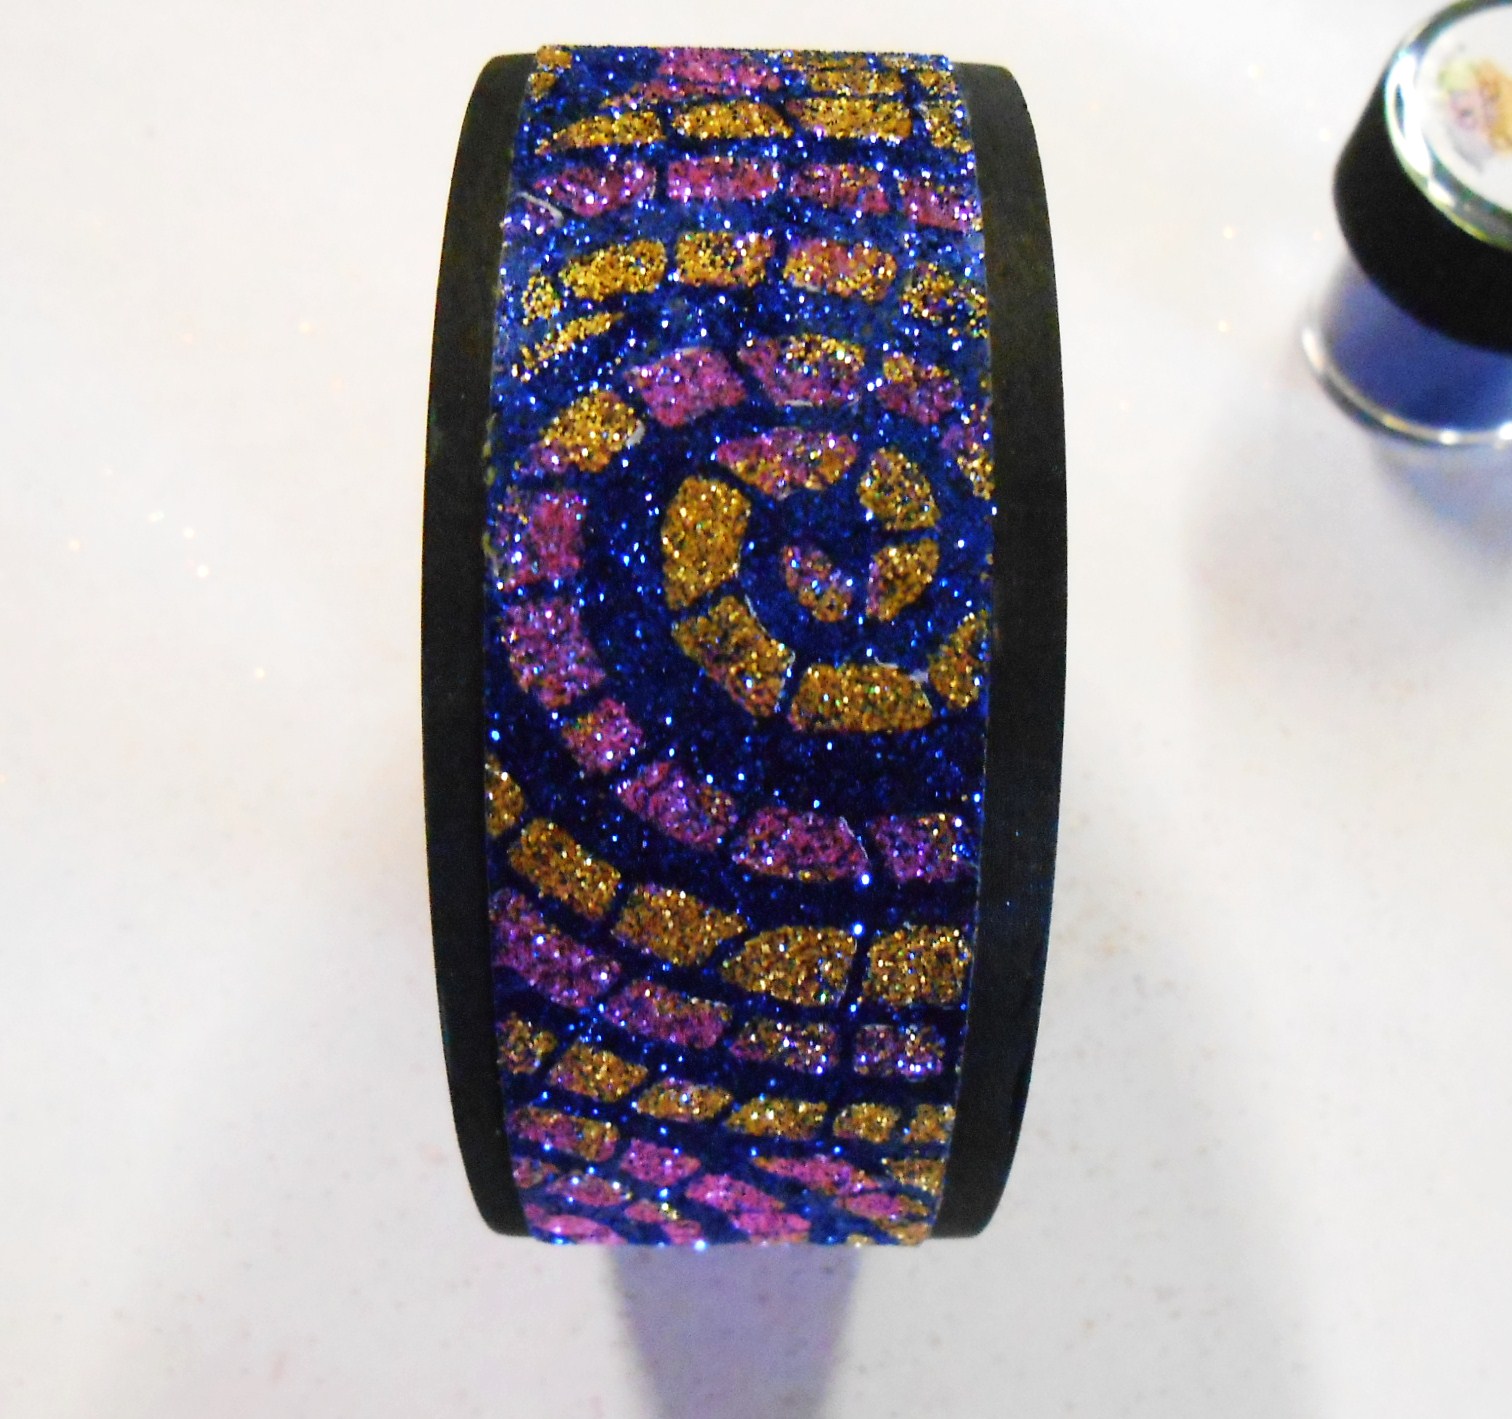
If you checked out the Art Glitter blog today you may have seen a card that I made with the Mosaic Swirl Stencil from Dreamweaver Stencils and the double glitter method. I am using that stencil again for another project. This time...a bangle bracelet.
For this project I used: Art Glitter (of course!) - Ultra Fine Pearlescent - #179 - Tang, Ultra Fine Transparent Neon - #238 - Barbie's, and Ultra Fine Opaque - #30 Royale.
And Dreamweaver Stencil - #901 - Mosaic Swirls
Bangle Blank from Diy Bangle.
Bangle Blank from Diy Bangle.


I removed the tape from the stencil and filled in the exposed areas with Royale blue glitter. I then removed the plastic backing from the glittered tape. This was probably the most challenging part of the project...but have patience and eventually you will get the backing to release.


awesome projects!!! GREAT job
ReplyDeleteFabulous project! Don't you just love those DIY bangles?
ReplyDeleteWow! Love the colors and of course the sparkle.
ReplyDeleteVery cool projects!
ReplyDeleteI love this bracelet! Incredible.
ReplyDelete