For this project I used: A chipboard "M" (you can use the letter of your choice :) Scraps of paper in her color scheme, Helmar Decoupage Paste, Helmar Gemstone Glue, Art Glitter Ultrafine Glitter - #249 Woodberry, Reusable stencil from Plaid, Embossing ink (Versa Mark) and embossing powder (Mardi Gras from Globecraft Memories).
Start with a chipboard letter
Tear scraps of paper and arranged them loosely on top of the M making sure everything will be covered and that you have a good balance of colors.
Use a sponge brush to brush a thin layer of Decoupage Past on the chipboard and lay the first piece of paper down. Then put more paste on top of the first piece, just where the second piece would over lap and make sure you have enough paste on the letter to hold the second piece in place.
Continue until you have the entire letter covered, with the papers extending beyond the edges.
Let dry completely.
Use an Exacto knife or razor knife to cut the excess paper away. Turn the letter upside down on a cutting surface and work from the backside. Don't try to hold your knife flat against the edge of the letter to cut. You will end up cutting into the chipboard. Hold the knife so it is at a 45 degree angle from the edge and follow the bottom edge of the letter. If you are impatient, like I was, and don't wait for your paste to be completely dry, your paper may not cut straight or may wrinkle or tear.
Brush the front of the letter with a generous coat of Decoupage Paste and let dry completely. If there were edges that came up during the cutting process, put a little paste under them and press them back into place.
My daughter loves Fleur de Lis, and I happened to find this pack of stencils from Plaid that had the Fleur de Lis on the front of the package. It was meant to be....
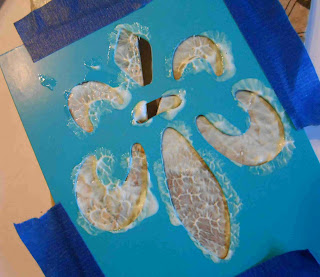
Tape the stencil in place with painter's tape.
Use a small sponge brush or stencil brush to stencil Gemstone Glue.
Remove the stencil and cover the glue with Art Glitter Ultrafine Glitter. Tap the excess onto a clean sheet of paper and pour back into the jar. Once the glue is dry, use a soft brush to brush any excess off the Letter.
I finished the "M" by adding some rhinestone Fleur de Lis from my stash drawer. Then I stamped and heat embossed some flourishes in the corners.
Please be sure to visit the Art Glitter Blog for more glittering creations!
Thanks for stopping by!
KC


No comments:
Post a Comment